Welcome to BIOMED SIMULATION Knowledge Base
Instructions to Replace Fuse in CALIFIA® Patient Module (CPM) Electronic Board
BACKGROUND:
Use these instructions to replace a blown fuse in the electronic board inside the Califia Patient Module (CPM).
PREPARATION:
- Drain the reservoir in its entirety
- Power off the unit
- Disconnect all external tubing
- Disconnect power cable and Ethernet cable
- Move the Califia Patient Module (CPM) to a table or benchtop with plenty of workspace
REQUIRED TOOLS:
- 2mm hex driver
- Small flat-blade screwdriver

STEPS TO REPLACE BLOWN FUSE:
- Use a 2 mm allen key or hex driver to remove the top panel screws, Figure 1, total of 14 screws.
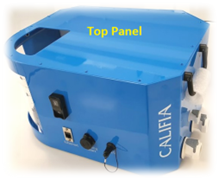
Figure 1. Califia Patient Module (CPM)
- Find a small plastic Ziploc bag taped to the interior side wall of the CPM. It should include the following fuses: 2x 1.5A and 2x 5A fuses.
- Identify embedded computer board, Figure 2.
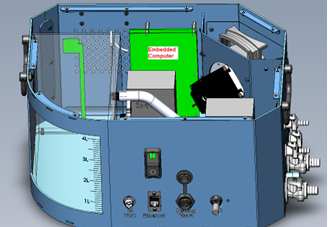
Figure 2. CPM with the top removed and Embedded Computer labeled
- Apply power to CPM and turn the power switch ON. Look for the red LED (light), Figure 3. The blown fuse would be above the red light.

Figure 3. CPM board with blown fuse identified
Power OFF CPM and disconnect from power.
- Pop blown fuse out from holder using flat blade screwdriver. Wedge screwdriver between spring-loaded top terminal then gently pry fuse out of socket.
- Identify replacement fuse. For instance, if the blown fuse is 5A, then make sure to replace it with the same size.
- Insert a new fuse into the cradle and gently secure using your finger.
- Apply power to CPM and power ON. Check all fuse lights are back to white.
- Replace CPM top.