Instructions for the CALIFIA® Simulator – Azure Edition for MacBook (OS) Users
- Article Information
This article provides set-up instructions for the Califia Simulator – Azure Edition software.
- How to use these instructions
New user: follow all instructions starting in Section 4. Introduction to Califia Simulator Azure Edition software.
New computer configuration: Start in Section 5. Prepare your computer to configure a new computer to access the Califia Simulator Azure Edition software.
Existing computer configuration: Start in Section 6. Access the Califia Simulator Azure Edition software
- Introduction to the Califia Simulator Azure Edition software
The Califia Simulator Azure Edition software is an edition of the Califia Simulator software hosted in Microsoft Azure cloud computing infrastructure. For reference, the edition of the Califia Sim software hosted and executed in a local computer is labeled Califia Simulator Standard Edition.
- Microsoft Azure
MS Azure is a comprehensive cloud-computing infrastructure. One of many services available in Azure is the Windows Virtual Desktop (WVD) virtual machines (VMs). These computers run MS Windows operating system and can be prepared to host Line-Of-Business (LOB) software such as the Califia Simulator software.
- Califia Simulator software
The Califia Simulator software application is used to simulate a patient’s physiology while treated with either ECMO (Extracorporeal Membrane Oxygenation) or CPB (Cardiopulmonary Bypass). The software also virtualizes the key instruments and devices used in ECMO or CPB.
- Califia Simulator Azure Edition software
The Califia Simulator Azure Edition software is the hosting of the Califia Simulator software in MS Azure cloud-computing infrastructure. Its key benefits are:
- Users can access the Califia Sim software from any computer (including tablets and smart phones).
- New software versions are made available to all users of the Azure edition simultaneously and seamlessly.
- Computing resources such as processors, memory and storage are provided by the Azure infrastructure and can be updated periodically.
- Califia Simulator Azure Edition modes of operation
The Califia Simulator Azure Edition software is currently offered in two modes of operation:
- Instructor Mode
This mode is similar to the Califia Simulator Standard Edition.
- Dual-screen support: Instructor’s Panel and Patient Monitor can run side-by-side.
- The Learner Control Panel is available so the instructor can step through clinical scenarios and experience the learner flow process.
- Single-screen support: The Instructor’s Panel and Patient Monitor would be available by toggling between the two.
- Learner Mode
- The software can only access the Patient Monitor, also referred to as the learner screen. The software runs in single screen only.
- Prepare your computer
- Using a MacBook (OS) to access Califia Simulator Azure Edition.
- Make sure you have a high-speed internet service available.
- From your App store search for Microsoft Remote Desktop and download it. You may be prompted to enter your Apple ID password, use Touch ID, or Face ID to confirm the download. Follow the on-screen instructions to complete the installation.
- Find the Microsoft Remote Desktop app icon and launch it, Figure 1.

Figure 1. Microsoft Remote Desktop icon
- If it is the first-time launching Microsoft Remote Desktop, you’ll be prompted to allow it to use your Microphone and camera, press Continue then OK, Figure 2.
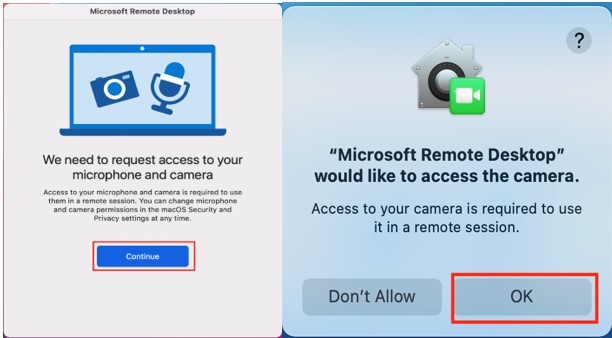
Figure 2. MS Remote Desktop app – Access to microphone and camera
- Navigate to the Workspaces section, Figure 3, then enter the following workspace URL:
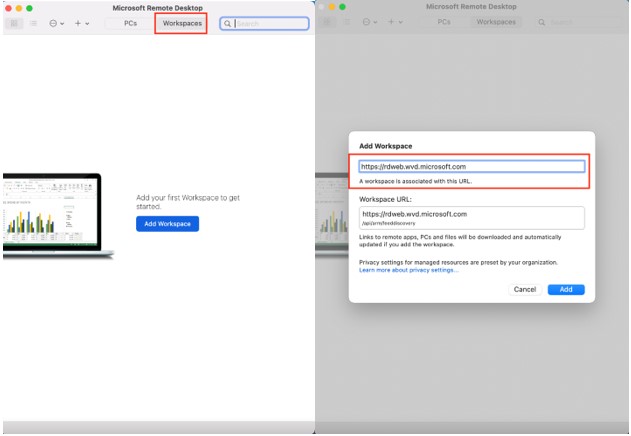
Figure 3. Remote Desktop app – add a Workspace
- Enter the user ID and password provided by Biomed Simulation with your Azure subscription, Figure 4.
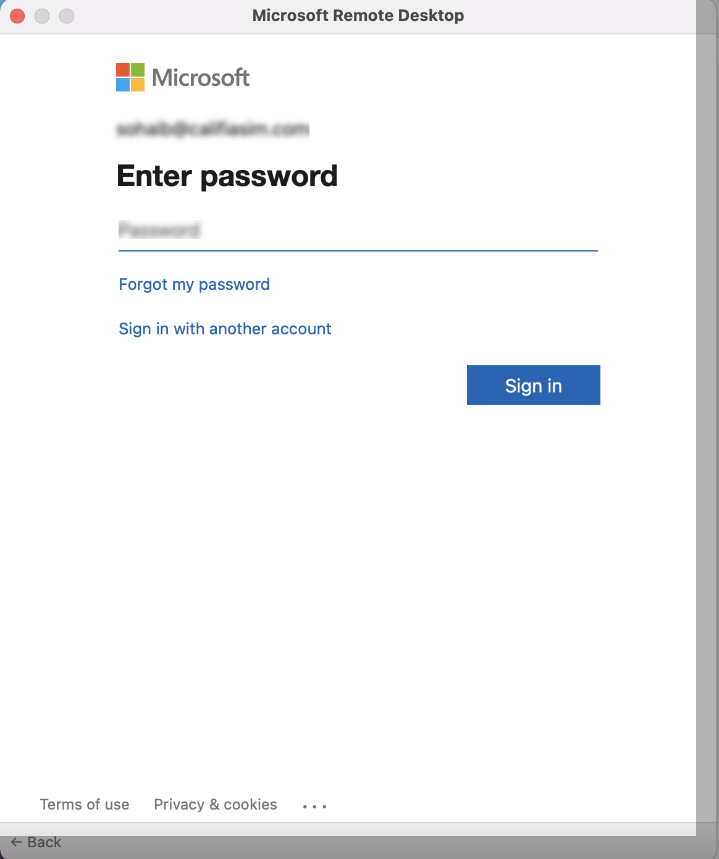
Figure 4. Remote Desktop app – login
- Follow the security instructions, you will need the Microsoft Authenticator App available on your smartphone. Download from the app store. Launch the app then press Next, Figure 5.

Figure 5. Remote Desktop app – Microsoft Authenticator
- Press the “+” on the Microsoft Authenticator App phone, then scan the barcode as shown in Figure 6.
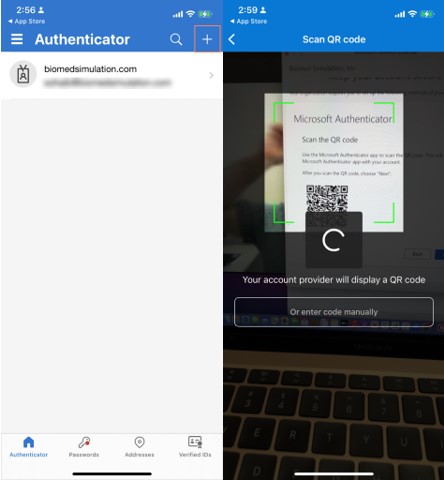
Figure 6. Microsoft Authenticator Application – Authentication process
- Once the Authentication process is complete, the Remote Desktop app will show one icon labeled Califia Simulator Azure Edition, Figure 7.
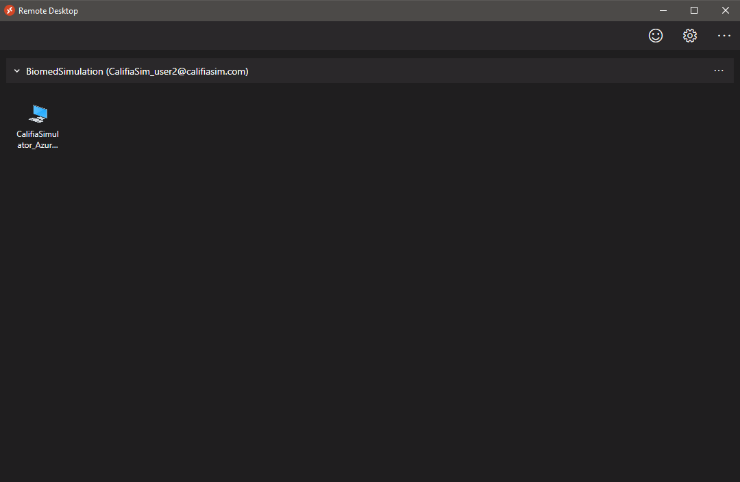
Figure 7. Remote Desktop – Califia Simulator Azure Edition icon
- Access the Califia Simulator Azure Edition software
Double-click the Califia Simulator Azure Edition icon to start a WVD session. It will prompt the user ID and password credentials provided by Biomed Simulation to log in, Figure 8.

Figure 8. Logging into an Azure WVD session
A remote desktop window (or windows) will launch displaying a Windows loading sequence. Wait up to 5 minutes for the process to complete, see Figure 9.
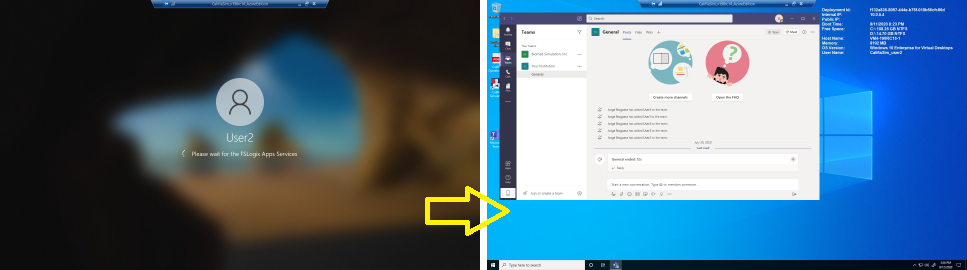
Figure 9. From initial Windows booting screen until it completes loading
6. Windows Desktop configuration
- Set Taskbar to automatically hide
- Right-click on the taskbar and select Taskbar Settings, Figures 11 & 12.

Figure 11. Access Taskbar settings
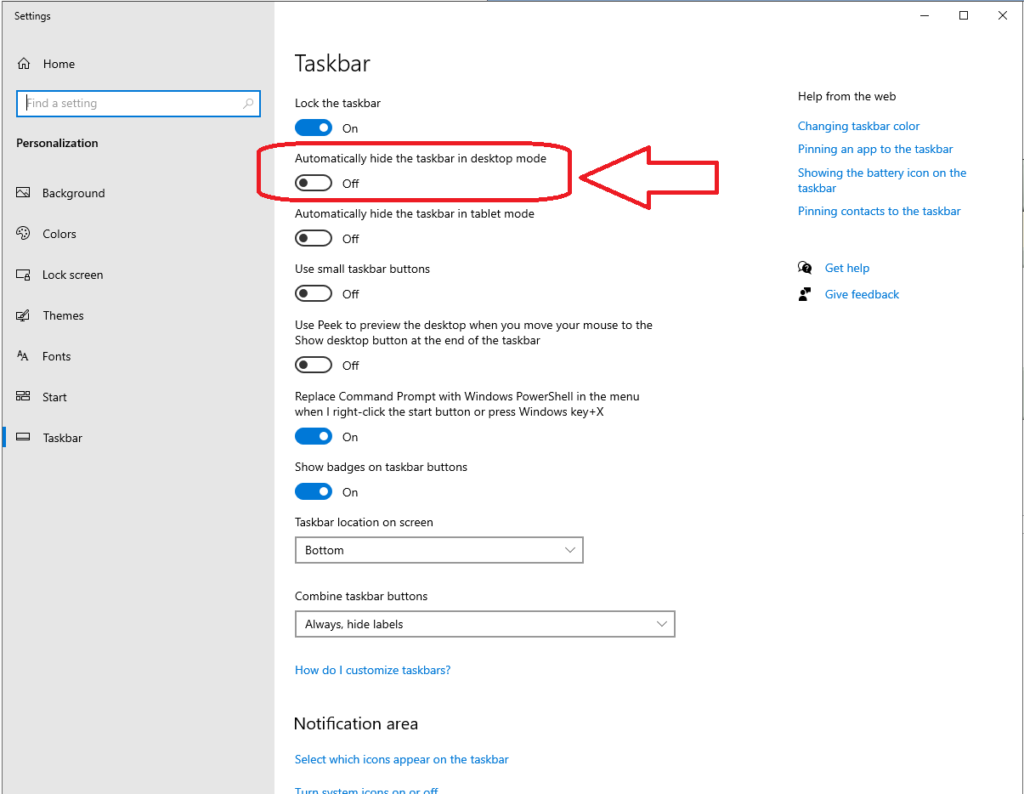
Figure 12. Uncheck Automatically hide the taskbar in desktop mode
- [Optional] Create desktop shortcut to N: storage drive and relabel it LIBRARY, Fig 13.
- This storage drive is available to all institutional users (instructors and students) to store simulation case bundles. The Califia Simulator software can unbundle and run these simulation cases. It is a convenient way to get started with SIM cases.
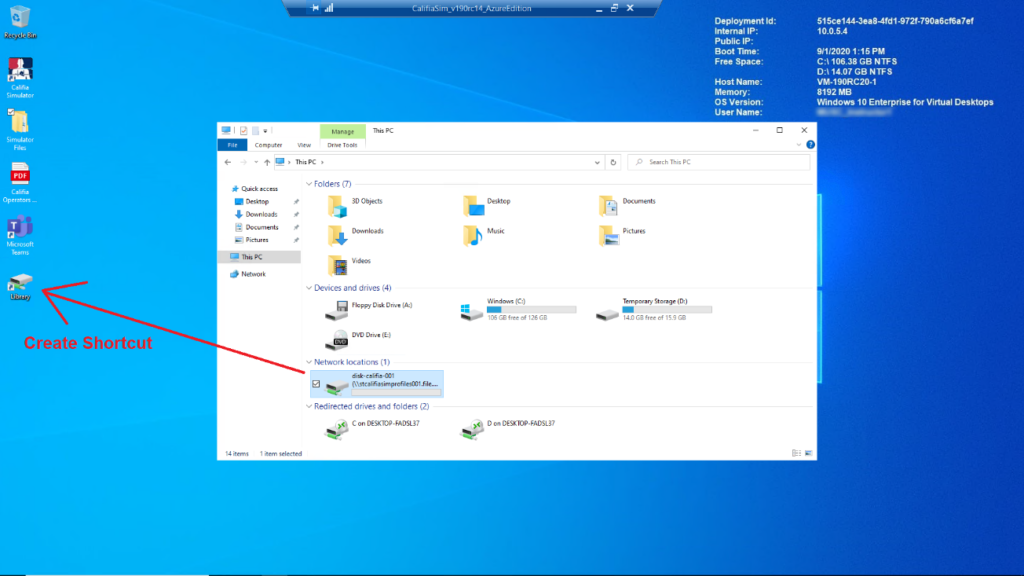
Figure 13. Network drive desktop shortcut